- Introduction
Let’s start with a confession: I used to walk past old furniture thinking, “Ugh, who’d want this junk?” But then one day, while scrolling mindlessly online, I stumbled upon a story about someone who made thousands flipping furniture. Thousands! Suddenly, that scuffed coffee table at my neighbor’s yard sale didn’t look so bad anymore.
Furniture flipping is like finding treasure where others see trash. It’s taking something worn, unloved, and forgotten, and giving it a glow-up worthy of Pinterest fame. Whether you’re here to make some extra cash, flex your creative muscles, or just save money on home décor, I’ve got good news: flipping furniture isn’t just for pros with fancy tools. If you can hold a paintbrush and don’t mind getting your hands a little dirty, you’re already halfway there.
Think about it: why spend a fortune on a new dining table when you could snag one for free (yes, FREE) and make it look like it belongs in a designer catalog? Plus, there’s something incredibly satisfying about saying, “Oh, that stunning table? I made it look this good!”
So whether you’re here to fund your next big dream or just want to try something new, you’re in the right place. By the time you’re done with this guide, you’ll be itching to grab a paintbrush and start flipping like a pro. Let’s dive in, shall we?
- Why Flip Furniture?
Why flip furniture? Let me count the reasons! First off, it’s ridiculously fun. You get to channel your inner Bob Ross (happy little tables, anyone?) and unleash your creativity on unsuspecting pieces of wood. But more than that, flipping furniture can transform your home—and your bank account.
Let me paint you a picture (pun intended). Imagine walking into a thrift store and spotting a beat-up old dresser for $10. Most people wouldn’t give it a second glance, but you? You see potential. A little paint here, some new knobs there, and suddenly, you’ve got a statement piece that looks like it came straight out of a high-end showroom. Sell it for $150, and boom, you just made a $140 profit. That’s enough to fund your coffee habit for weeks—or months if you’re a home brewer like me!
And it’s not just about the money (although, let’s be real, the money is great). Flipping furniture is also a fantastic way to personalize your space without breaking the bank. Want a farmhouse-style dining table? Make one! Craving a mid-century modern coffee table? You can have it—minus the hefty price tag. With furniture flipping, you’re not just saving money; you’re creating pieces that reflect your unique style.
Plus, let’s not forget the environmental perks. Every piece of furniture you rescue from the curb or thrift store is one less item heading to the landfill. It’s like being a superhero for old furniture—saving the planet, one dresser at a time.
And here’s the best part: you don’t need to be a DIY expert to get started. Trust me, I once accidentally glued my fingers together during a project, and I still managed to turn out some pretty amazing pieces. If I can do it, you can too.
So whether you’re flipping furniture for fun, profit, or the sheer joy of giving old pieces new life, know this: you’re about to embark on a journey that’s as rewarding as it is exciting. Ready to roll up your sleeves? Let’s get started!
3.1 Treasure Hunting
Ah, treasure hunting—the thrill of the chase! Forget pirate ships and gold coins; we’re talking about rummaging through yard sales, thrift stores, and online marketplaces to find hidden gems. It’s like being on your very own reality TV show, where the prize isn’t just a fabulous coffee table but also the smug satisfaction of knowing you snagged a deal.
The first rule of treasure hunting is to keep an open mind. That scratched-up dresser with a missing knob? It could be your next masterpiece. You just need to look past the flaws and imagine the possibilities. And trust me, the possibilities are endless. I once picked up a wobbly side table that looked like it had been through a hurricane (or a toddler’s bedroom—same thing) and turned it into a chic nightstand that sold for $80.
Where do you find these treasures, you ask? Anywhere and everywhere! Garage sales are like mini treasure islands where people are practically giving stuff away. Thrift stores? Goldmines for vintage and solid wood pieces. And then there’s the magical world of online marketplaces—Craigslist, OfferUp, and Facebook Marketplace are your best friends here. Pro tip: always check the “Free” section. You’d be amazed at what people are willing to part with for the low, low price of hauling it away yourself.
But wait, there’s more! Have you heard of apps like Trash Nothing? It’s like Tinder, but for free furniture. Swipe right on that antique chair, and suddenly you’re in possession of a piece that just needs a little love to shine.
The key to success is patience. Sometimes you won’t find anything worth flipping, and that’s okay. Don’t settle for a piece that doesn’t spark joy—or at least a spark of creative vision. And remember: the best treasures often don’t look like treasures at first glance. They might be buried under peeling paint or buried in someone’s garage, but that’s part of the fun.
3.2 Cleaning the Furniture
Once you’ve hauled your treasure home (and possibly thrown your back out in the process—worth it), it’s time to give it a good scrub. Cleaning your furniture is like giving it a spa day—it’s the first step to revealing its hidden potential.
Start by wiping off any dust and cobwebs. I like to pretend I’m uncovering a priceless artifact from an ancient civilization, even if it’s just a $5 side table from Goodwill. Next, mix up a 50/50 solution of white vinegar and water. This magical elixir not only cleans but also disinfects and de-greases. Plus, it’s cheap—what’s not to love?
Pro tip: Always test your cleaning solution on a small, inconspicuous area first. We’re cleaning the furniture, not stripping it of its soul (or finish).
And yes, the vinegar smell can be a bit… overwhelming. But don’t worry, it fades. If you’re really struggling, just remind yourself that this smell is the scent of transformation. And if that doesn’t work, light a candle.
For stubborn stains or sticky spots, try a gentle dish soap mixed with warm water. If that doesn’t work, roll up your sleeves and grab a little elbow grease. Just don’t go too hard—you’re cleaning a treasure, not trying to scrub your sins away.
3.3 Fixing Minor Damages
Now comes the part where you play doctor to your furniture. Got scratches, dents, or holes? No problem. You’re about to give that old piece a whole new lease on life.
First up: scratches. If they’re shallow, rub a walnut over them. I know it sounds nuts (pun absolutely intended), but the oils in the walnut can help hide light scratches. For deeper gouges, you’ll need a trusty wood filler. Elmer’s Wood Filler is my go-to—it’s like Botox for furniture. Fill the dents, let it dry, and sand it down until it’s smooth. Easy peasy.
Missing chunks of wood? Don’t panic. You can use wood putty or even a bit of sawdust mixed with wood glue. It’s like playing with clay in kindergarten, but this time, you’re making something cool.
Loose joints or wobbly legs? Grab some wood glue and clamps. A little patience and pressure will have that furniture standing tall again. And if a screw is missing, head to your local hardware store—they’ve got bins of screws in every size imaginable. Just bring the old one with you for comparison, or you’ll end up like me, buying three different sizes and hoping for the best.
Got peeling veneer? Carefully glue it back down with wood glue, then use a heavy book (or whatever you’ve got handy) to hold it in place while it dries. Pro tip: If the veneer is beyond saving, you can always remove it entirely and sand the surface underneath.
Think of this step as giving your furniture a makeover. It might not look perfect yet, but every little fix gets it closer to being the show-stopping piece it’s destined to become. And remember: perfection is overrated. The charm of flipping furniture lies in its character, flaws and all.
3.4 Sanding the Furniture
Ah, sanding—the not-so-glamorous, dusty part of furniture flipping. But don’t let that scare you off! Sanding is where the magic begins. It’s like exfoliating your furniture, sloughing off all that old, tired finish to reveal the beauty underneath. Think of it as a spa treatment for your piece, minus the cucumber slices.
First, let’s talk tools. If you’ve got a random-orbit sander, congratulations—you’re officially living in the future. This little gadget makes sanding faster, easier, and way more fun. But if you’re working with just your two hands and a piece of sandpaper, don’t worry—you’ll get there. It just takes a little extra elbow grease (and maybe a podcast to keep you entertained).
Now, before you dive in, grab some safety gear. A good pair of goggles and a mask are non-negotiable unless you enjoy inhaling sawdust (spoiler: you don’t). Once you’re all geared up, it’s time to pick your sandpaper grit.
Here’s the breakdown:
- 40-60 grit: For stripping paint, varnish, or other tough finishes.
- 80-120 grit: For smoothing out imperfections after major sanding.
- 300+ grit: For the final touch, creating a silky-smooth surface.
Start with a coarser grit to tackle any rough spots or peeling finishes, then work your way up to finer grits for a polished look. And don’t forget to sand in the direction of the wood grain. Trust me, your furniture will thank you for it (or at least look like it does).
Once you’re done, grab a tack cloth to wipe away all the dust. Skipping this step is like skipping the rinse cycle on your laundry—not a good idea. Clean surfaces make for better priming, which brings us to our next step.
3.5 Priming the Furniture
Priming might not be as thrilling as painting, but it’s so important. Think of primer as the base layer of your furniture’s new look. Without it, your paint won’t stick properly, and all your hard work could end up peeling away like a bad sunburn. Yikes.
If you’ve skipped sanding (no judgment, we’ve all been there), primer becomes even more crucial. It helps smooth out imperfections and creates a surface that paint can cling to.
Now, what kind of primer should you use? Personally, I’m a fan of Zinsser Bulls Eye 1-2-3 Primer. It’s easy to use, dries quickly, and works on almost any surface. If you’re short on time (or patience), you can opt for a spray primer, but keep in mind it’s less cost-effective.
Before you start, give your primer a good stir. Then grab a high-quality brush—don’t skimp here! A cheap brush will shed bristles faster than your cat sheds fur, and no one wants to pick stray hairs out of their primer. Apply a thin, even coat and let it dry for at least three hours.
Pro tip: Lightly sand the primed surface with a fine-grit sandpaper (300+ grit) to smooth out any rough spots. It’s an extra step, but it makes a world of difference when you move on to painting. And speaking of painting…
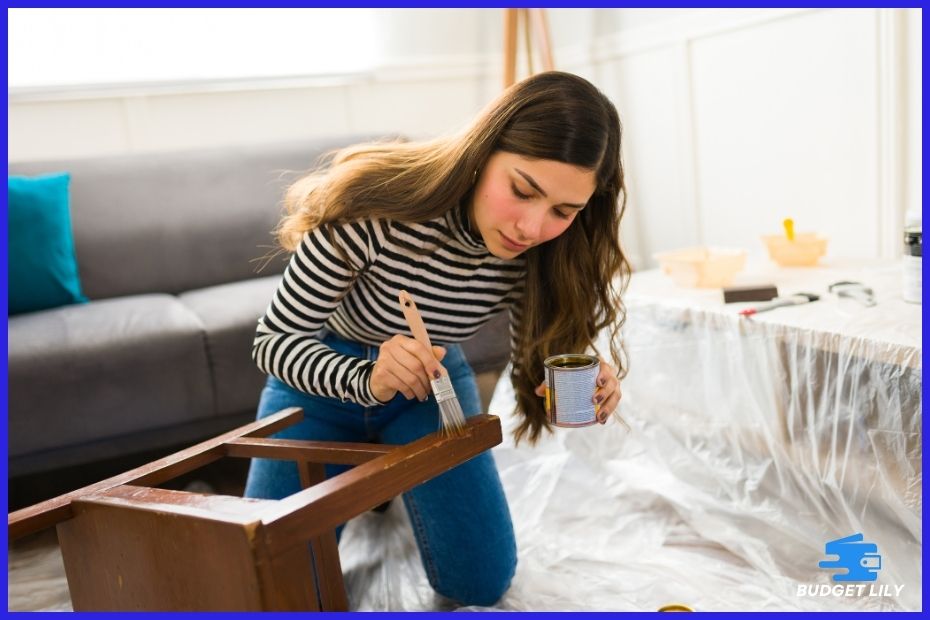
3.6 Painting the Furniture
Finally—the moment you’ve been waiting for! Painting is where your furniture goes from “meh” to magnificent. It’s like giving your piece a fresh outfit that’s ready to turn heads.
First things first: choose the right paint. I swear by Home Depot’s Behr Premium Plus Ultra Interior Paint with a matte finish. It’s durable, easy to work with, and gives your furniture that chic, chalky look everyone’s obsessed with.
Got your paint? Great. Now grab a high-quality brush, like the Purdy angled brush set. I can’t stress this enough: a good brush makes all the difference. A cheap one will leave streaks and stray bristles, which is basically the DIY equivalent of having spinach in your teeth during a photo shoot.
Start with light, even strokes. Don’t glob the paint on—it’s better to do multiple thin coats than one thick, gloopy mess. Trust me, patience pays off here. Most pieces will need two to three coats for full coverage, but always let each coat dry completely before applying the next one.
If you’re going for a distressed, farmhouse look, you can lightly sand the edges and corners between coats. For a more polished finish, skip the sanding and focus on smooth, even layers.
Oh, and let’s talk about colors for a second. Neutrals like white, gray, and black are always safe bets because they appeal to a wide range of buyers. But if you’re keeping the piece for yourself, don’t be afraid to go bold! A pop of teal or mustard yellow can add so much personality to your space.
Once your final coat is dry, step back and admire your work. Doesn’t it look amazing? You’ve officially turned a sad, forgotten piece of furniture into a showstopper. And the best part? The fun isn’t over yet—we’ve still got some designing and sealing to do!
3.7 Designing the Furniture
Now that your piece is painted and looking fresh, it’s time to let your creativity shine! Designing furniture is where you get to have the most fun. Think of this step as giving your piece the cherry on top—it’s what transforms “Oh, nice table” into “Wow, where did you get that?!”
The easiest way to add flair is by swapping out the hardware. Old knobs and handles can make even the most fabulous paint job feel a little dated, so grab some new ones! Ceramic pumpkin knobs are a personal favorite of mine—they’re charming, timeless, and instantly add personality. Don’t like pumpkins? No problem. You can find knobs shaped like flowers, animals, or even miniature globes if you’re feeling adventurous.
If you’re up for something more daring, try stenciling. Stencils are like tattoos for furniture—they add character without the lifelong commitment. You can stencil patterns, quotes, or even geometric designs. Pro tip: Always use a stencil brush and dab the paint lightly to avoid smudging. Trust me, less is more here.
Still not enough pizzazz? Try decoupage! It’s a fancy word for gluing decorative paper or fabric onto your furniture. Imagine a drawer lined with vintage maps or floral patterns—it’s an instant conversation starter.
For those who prefer a minimalist vibe, consider distressing. Sand the edges and corners lightly to give your piece a worn, vintage look. It’s like creating a little story for your furniture—one that says, “I’ve been around, but I still look fabulous.”
And don’t forget about color-blocking! Painting different sections in complementary shades can add a modern twist to classic designs. The key is balance: stick to two or three colors max to keep it from looking like a circus tent.
Designing is your chance to let your imagination run wild. There’s no right or wrong—just whatever makes you smile every time you look at your piece. So go ahead, add those sparkly gold handles or paint a quirky pattern. It’s your masterpiece, after all!
3.8 Sealing and Protecting the Furniture
Congratulations! Your furniture looks amazing. But wait—it’s not quite ready for its debut just yet. The final step is sealing and protecting it to ensure all your hard work lasts. Think of it like putting a topcoat on your nails: it’s the finishing touch that keeps everything shiny and chip-free.
For high-traffic pieces like coffee tables, dining tables, or dressers, I highly recommend using Polycrylic. It’s durable, water-resistant, and available in various finishes (matte, satin, glossy—take your pick!). Matte is my go-to because it hides imperfections and gives a subtle, sophisticated look.
To apply Polycrylic, grab your trusty high-quality brush (remember the Purdy set?) and paint on thin, even coats. Let each coat dry for about an hour, then lightly sand with fine-grit sandpaper (300+ grit) before applying the next one. Three coats should do the trick. Yes, it’s a bit tedious, but your furniture will thank you when it survives spilled coffee or a toddler’s crayon attack.
If you’re sealing a decorative piece that won’t get much wear and tear, wax can be a great alternative. Minwax Paste Finishing Wax is a classic choice that gives a soft, buttery finish. Just rub it on with a cloth, buff it out, and voilà—instant charm! Keep in mind, though, wax isn’t as protective as Polycrylic, so save it for things like side tables or lamp bases.
One last tip: always let your sealant cure completely before using your furniture. It might feel dry to the touch after a few hours, but it needs about 24 hours to fully set. I know it’s hard to wait, especially when you’re dying to show off your masterpiece, but trust me—it’s worth it.
And there you have it! Your once-forgotten piece of furniture is now a stunning, fully functional work of art. Whether you’re keeping it for yourself or selling it for a tidy profit, you’ve officially joined the ranks of furniture-flipping pros. Time to celebrate—preferably with a cup of coffee at your brand-new (and very stylish) table.
- Listing and Selling Your Furniture
So, your furniture masterpiece is complete. It’s gleaming, gorgeous, and ready to strut its stuff in front of potential buyers. Now comes the exciting (and slightly nerve-wracking) part: listing and selling your furniture. This is where you turn all your hard work into cold, hard cash.
First things first: take great photos. And I mean great photos. Think bright natural light, clutter-free backgrounds, and a camera angle that makes your piece look like it belongs in a fancy interior design magazine. If your kitchen table has suddenly become your photo studio, you’re doing it right. A quick wipe-down to ensure the furniture looks spotless doesn’t hurt either.
Pro tip: Take both wide shots and close-ups. Wide shots give buyers the big picture (literally), while close-ups highlight the stunning details—like that distressed finish you worked so hard on or those chic new knobs.
Now, let’s talk about platforms. Where you list your furniture depends on your location and target audience, but here are some tried-and-true options:
- Facebook Marketplace: Easy to use and great for local buyers. Plus, you can join local buy-and-sell groups for even more exposure.
- Craigslist: A classic choice, especially for larger items like dining tables and dressers.
- Etsy: Ideal for unique, hand-designed pieces. Buyers on Etsy are often willing to pay a premium for one-of-a-kind creations.
- Instagram: Yes, Instagram! Create a dedicated profile for your furniture flips and share before-and-after pics. A well-curated Instagram feed can attract loyal customers.
- Specialty Apps: Platforms like OfferUp, Letgo, and Kijiji (for my Canadian friends) are perfect for reaching local buyers.
When you’re writing your listing, be honest but creative. Highlight the best features of your piece, like “solid wood construction,” “newly refinished,” or “farmhouse-chic style.” But also mention any imperfections. Transparency builds trust and avoids awkward refund requests later.
For example:
“This vintage nightstand has been beautifully refinished in a modern gray matte paint and sealed for durability. It’s sturdy, stylish, and ready to add charm to your space! Note: There’s a small scuff on the back, but it’s not visible when placed against a wall.”
Pricing your furniture can feel tricky, but here’s the rule of thumb: cover your costs, pay yourself for your time, and leave room for profit. If you’re unsure, check similar listings in your area to get an idea of market rates.
Finally, be prepared to negotiate. Buyers love a good deal, so keep your bottom-line price in mind and aim a little higher with your initial asking price. That way, you can “compromise” while still hitting your goal.
And remember, selling isn’t just about the money—it’s also about the satisfaction of knowing your hard work is now making someone else’s home a little more beautiful.
- Common Questions About Flipping Furniture
Q: Is flipping furniture worth it?
Absolutely! Flipping furniture is worth it not just for the money (which can be pretty great) but for the joy of transforming something old into something new. It’s like being a magician, but instead of pulling rabbits out of hats, you’re pulling profits out of scratched dressers.
Yes, there are occasional flops. I once painted a desk a bold shade of orange, thinking it would be trendy, but it just sat there, unloved, for months. Lesson learned: bold isn’t for everyone. But those flops are rare, and even then, they’re opportunities to learn and grow.
Q: Is refurbishing furniture profitable?
It can be very profitable if you’re strategic. Stick to solid wood pieces—they’re higher quality and easier to sell. Unique designs, like mid-century modern or farmhouse styles, are also in demand. And don’t underestimate the power of good photography and a catchy description.
For example, I once turned a free curbside find into a $150 sale with just a little paint and some trendy new handles. That’s a 100% profit margin (okay, minus the $15 for paint and knobs, but still!).
Q: How much money can you make flipping furniture?
How much you make depends on how much time and effort you’re willing to put in. As a beginner, you can realistically earn $500 to $1,000 per month by flipping smaller items like nightstands or coffee tables. If you scale up to larger pieces—like dining sets or dressers—and put in more time, you could earn $2,000 or even $5,000 a month.
Take it from me: when I first started, I made about $400 in my first month. By month three, I was hitting $1,000 consistently. The key is finding quality pieces, pricing them right, and building a reputation for great work.
Q: What if I mess up?
Here’s the thing: everyone messes up. My first project looked like it had been painted by a blindfolded raccoon. But guess what? I learned from it. Every mistake is a stepping stone to improvement. Plus, furniture is surprisingly forgiving. A little sanding, some touch-up paint, and voilà—it’s like the mistake never happened.
Q: Do I need a lot of tools to start?
Nope! You can start with just the basics: sandpaper, a paintbrush, and some paint. As you get more into it, you might want to invest in an electric sander or a set of good-quality brushes, but you don’t need a fully stocked workshop to create beautiful pieces.
- Final Tips for Beginners
So, you’re ready to dive into the world of furniture flipping? Amazing! Before you roll up your sleeves and grab that paintbrush, let me leave you with a few final pearls of wisdom. Trust me, these tips are like the secret sauce to make your flipping journey smoother, more fun, and (hopefully) more profitable.
- Start small.
I know the idea of flipping a giant dining table sounds exciting, but if you’re new to this, it’s better to start with something manageable—like a side table or a stool. Why? Smaller pieces are easier to work on, take less time, and are less intimidating. Plus, if you mess up (which happens to the best of us), it’s no biggie. Think of it as a practice run before you tackle the bigger stuff. - Don’t overthink it.
This is your permission slip to stop worrying about perfection. Remember, furniture flipping is as much about creativity as it is about technique. Your first few pieces might not look like they belong in a designer catalog, but that’s okay! It’s all part of the learning process. As long as you’re having fun and improving with each project, you’re on the right track. - Invest in good tools (but not all at once).
When you’re just starting, it’s tempting to buy every fancy tool and gadget out there. Resist the urge! Start with the basics—sandpaper, a decent paintbrush, and maybe a random-orbit sander if you’re feeling ambitious. You can always build up your toolkit as you go. Besides, half the fun is learning how to MacGyver your way through a project with what you have. - Embrace mistakes.
Here’s a little secret: even seasoned flippers make mistakes. I once painted a chair a lovely shade of mint green, only to realize it clashed horribly with the rest of the design. Oops. But mistakes are just happy little detours, as Bob Ross would say. If something doesn’t turn out the way you planned, don’t stress—get creative and find a way to make it work. - Build your network.
Flipping furniture isn’t just about the pieces; it’s also about the people. Join local Facebook groups, thrift store communities, or even furniture flipping forums. These groups are goldmines for tips, tricks, and potential buyers. Plus, they’re a great place to show off your work and get some well-deserved applause. - Keep learning.
The world of furniture flipping is always evolving, with new trends, techniques, and tools popping up all the time. Watch tutorials, follow flipping influencers on Instagram, and don’t be afraid to experiment. The more you learn, the better (and faster) you’ll become. - Have fun.
At the end of the day, flipping furniture should be enjoyable. Sure, it can be a bit messy, and yes, you might find yourself covered in paint and sawdust more often than not. But there’s something so satisfying about taking a piece of furniture that’s seen better days and turning it into something beautiful. So laugh at your mistakes, celebrate your wins, and enjoy the ride! - Conclusion
And there you have it—the complete beginner’s guide to flipping furniture. Whether you’re here to make some extra cash, unleash your inner artist, or just save a few bucks on home décor, I hope this guide has given you the confidence to dive in.
Flipping furniture is more than just a side hustle; it’s a journey. Along the way, you’ll discover new skills, meet fellow flippers, and maybe even develop a newfound appreciation for the beauty of “old” things. It’s a reminder that with a little love, effort, and creativity, you can turn even the most overlooked pieces into something extraordinary.
Remember: you don’t need to be a DIY expert to get started. Just take that first step. Maybe it’s picking up a beat-up coffee table from a garage sale. Maybe it’s digging out an old chair from your attic. Whatever it is, know that you have what it takes to make something amazing.
So grab your tools, channel your creativity, and go flip some furniture! Who knows? You might just discover a hidden talent—or a new favorite hobby. And when you sell your first piece (or even just finish it), don’t forget to celebrate. Trust me, that feeling of accomplishment is like nothing else.
Now go on, friend. The world of furniture flipping is waiting for you—and it’s going to be fabulous.